
Raw image makeover!
Recently, I've been running 'Theme Weeks' on Facebook, Instagram and Twitter in which I post one image per day over a week based on a different theme each week. It's been a great exercise in coming up with ideas but it's also been a great opportunity to look back at my archives from years past. Whilst doing so I've been noticing that some of my earlier images could do with a makeover and I wanted to explain how you can achieve this with your own images.
If you've been a user of Adobe Lightroom for a number of years, it's likely that you've experienced many updates along the way. Those updates have incorporated many new tools which have transformed the way we now work. When Lightroom was first launched I used it for basic adjustments before exporting the image to Photoshop for adding the final touches thereafter. These days, unless I need to do really advanced editing, pretty much all of my processing (and printing) is carried out in Lightroom. However, have you thought about how your older images might benefit from a makeover using these new tools?
Let's take a look at two relatively recent Lightroom tools which helped me give this image a new lease of life! There are many other new tools and features that have come about since - including De-Haze, Clarity, Texture and more.
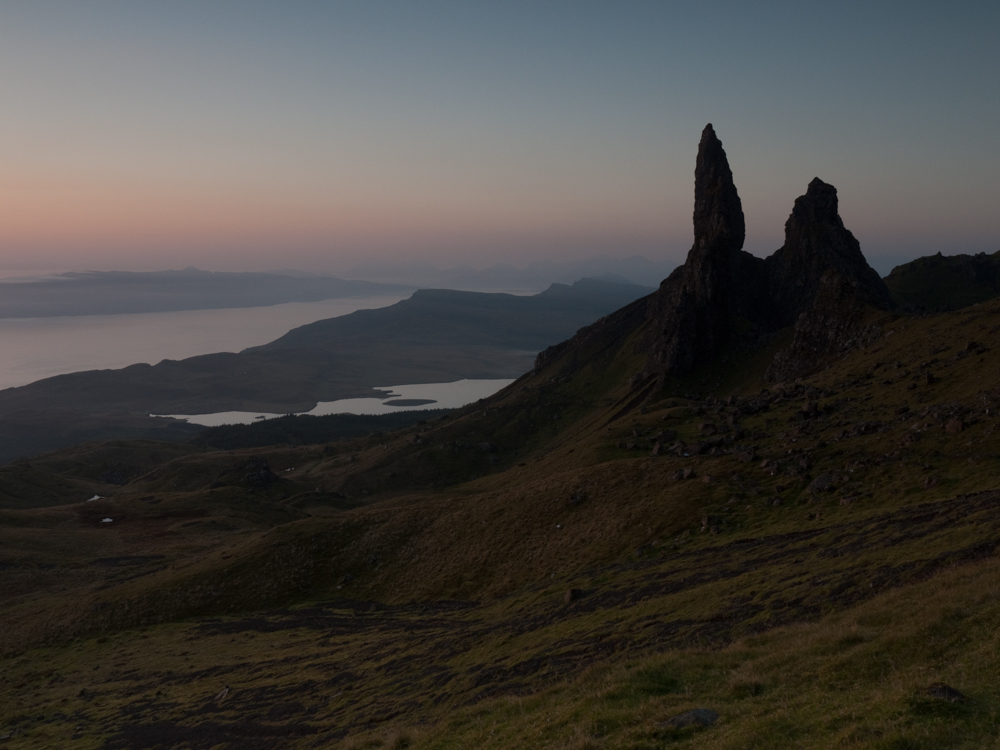
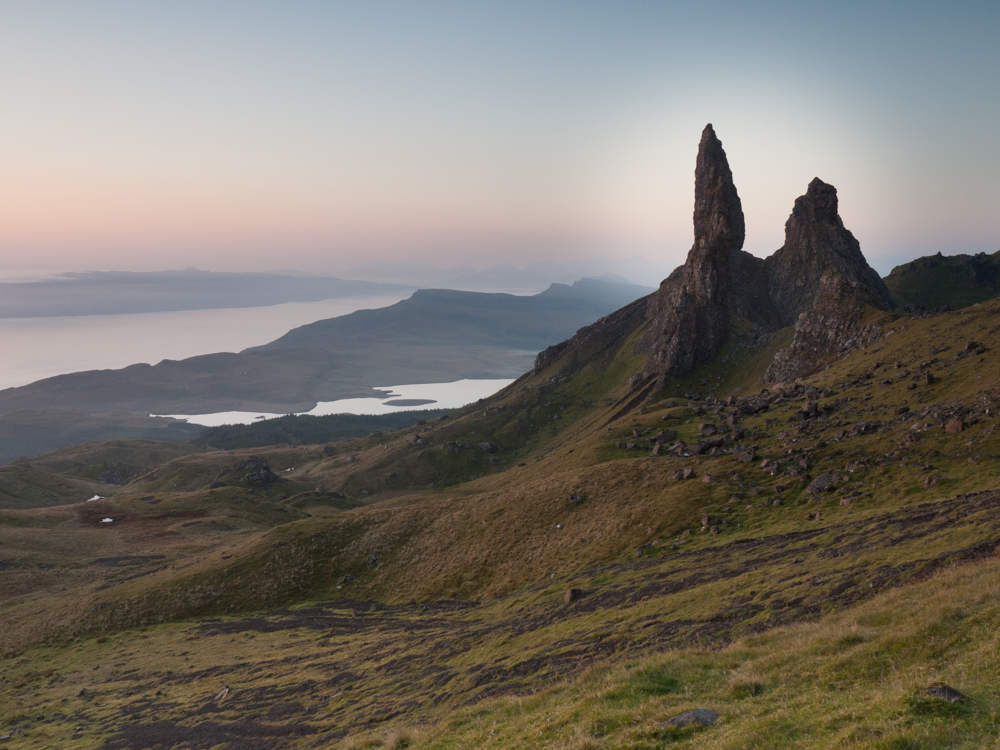
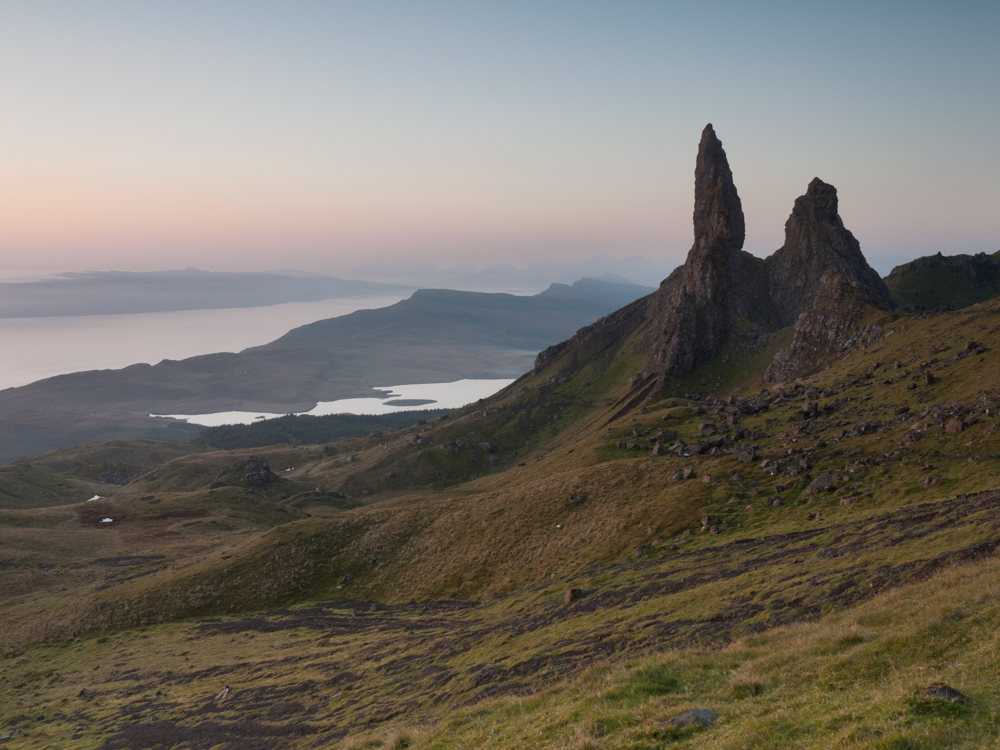
So let's take this unedited Raw image made in 2010 from The Needles (or Old Man of Storr) on the Isle of Skye. This is one that I took with a Panasonic G1 camera and is, in fact, one of a series took with the intention of creating a panoramic image in Photoshop so that I could capture the sunrise and the Needles together. At that time, Lightroom couldn't create a panoramic image from a set of individual images so each one had to be worked on individually before exporting to Photoshop for stitching - a long and laborious job ending in a large Tiff or PSD file. One of the more recent additions to Lightroom is the ability to stitch multiple images together to create a panoramic image - even better, it remains a raw (DNG) file at the end!
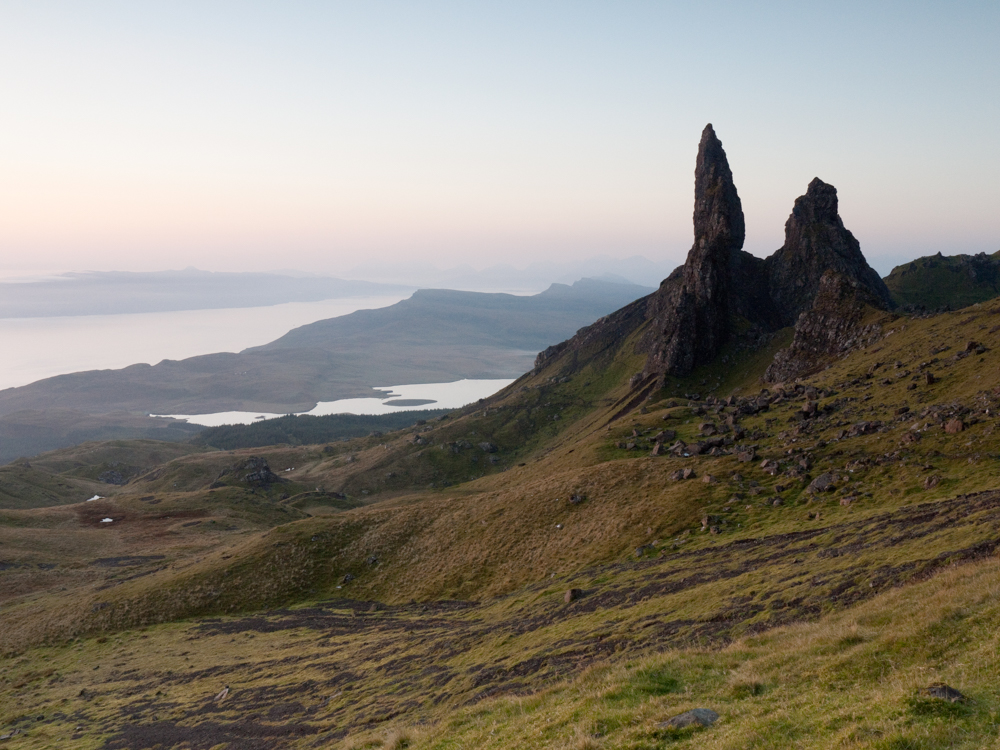
As you can see, the original image is underexposed somewhat. The reason for this is that I was trying to keep the exposure of all images similar (to make it easier for stitching later on) and as one of them was going to be pointing straight into the sun I was concerned not to blow out the highlights (I would probably use a different technique now but this is how I did it back then). This meant I would need to increase the exposure overall, which I have shown here.
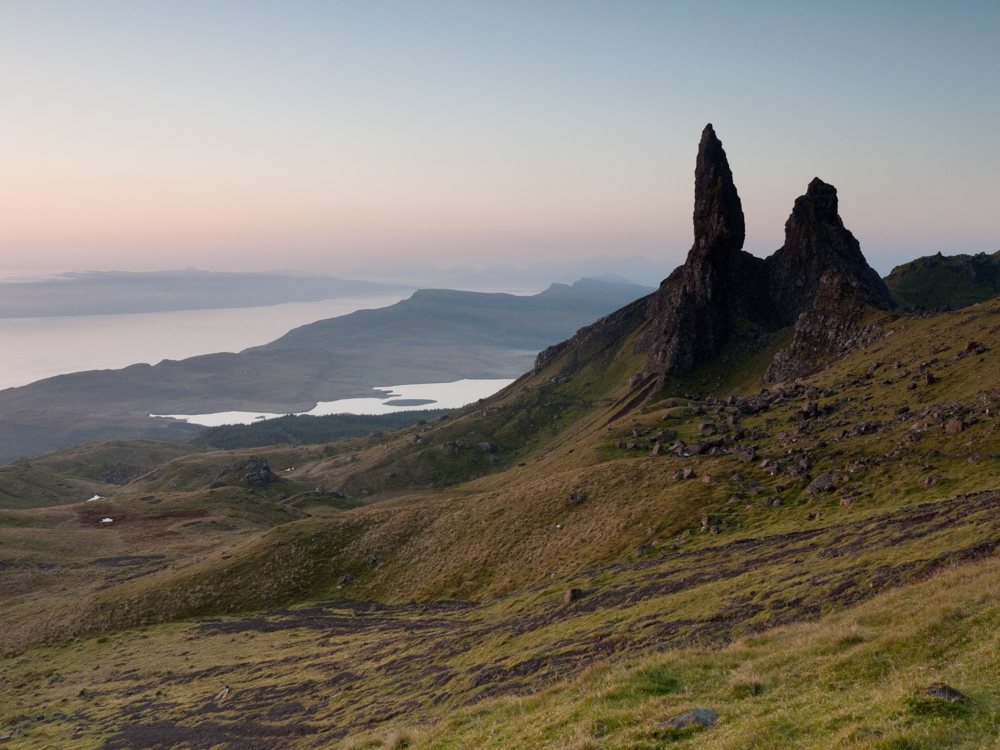
Now that I'm happy with the exposure of the foreground I now find that the sky is too bright. I, therefore, use the graduated filter tool to reduce the brightness of the sky like so.
This has helped to balance the image but by doing so has blocked up shadow detail on the Needles themselves. The only option I had the first time I processed the image back in 2010 was to use the Brush tool to brush in more exposure over the Needles. However, if not used carefully you can leave tell-tale signs of brushing - usually leaving halo's around the edge of the Needles or not quite removing all the shadows as simulated here. One small feature the Brush Tool had was Auto Mask, which did (and still does) help - up to a point.
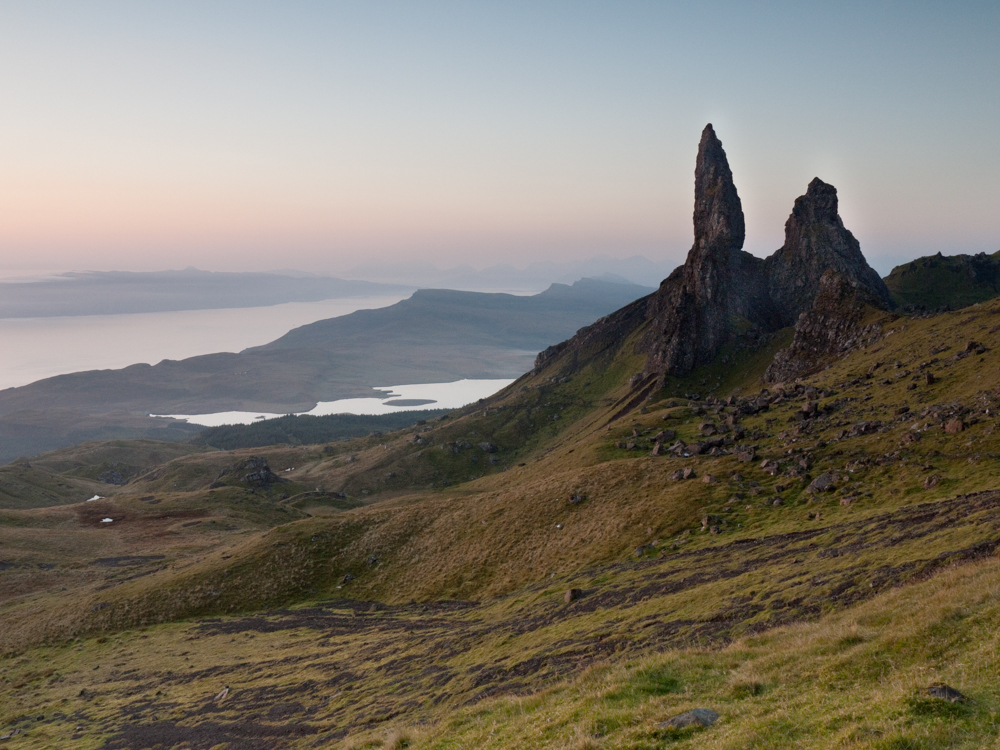
So this is an example of the typical constraints we were faced with in the early days of processing in Lightroom. It wasn't impossible to get a good finish but it wasn't easy either at times.
Fortunately, things have moved on. I can, therefore, give this image a total makeover with Lightroom's new toolset but first, you need to tell Lightroom that you wish to use them on your old images, otherwise it will use the older toolset it was originally edited with.
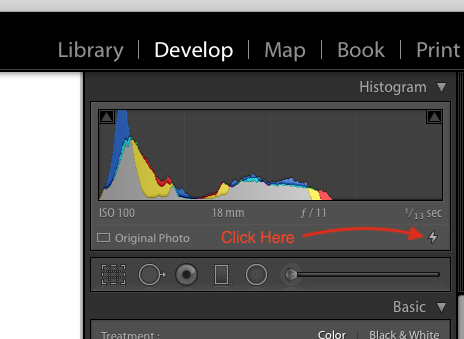
First, you locate your old, original image and open it in the Develop Module of Lightroom. At the top of the right column if you notice a symbol that looks like a Lightning strike then your image will still be using an earlier version of the editing toolset. By clicking the Lightning symbol a pop-up box will appear asking you if you would like to update the process version. Selecting 'Update' will update the tools available for editing the image (see image below).
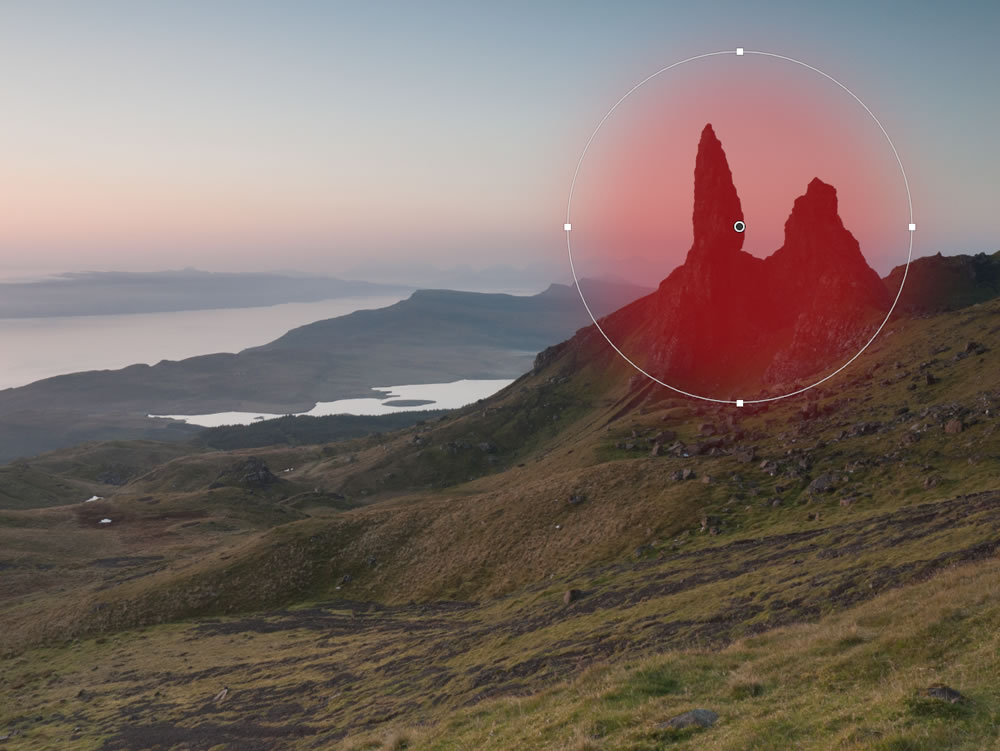
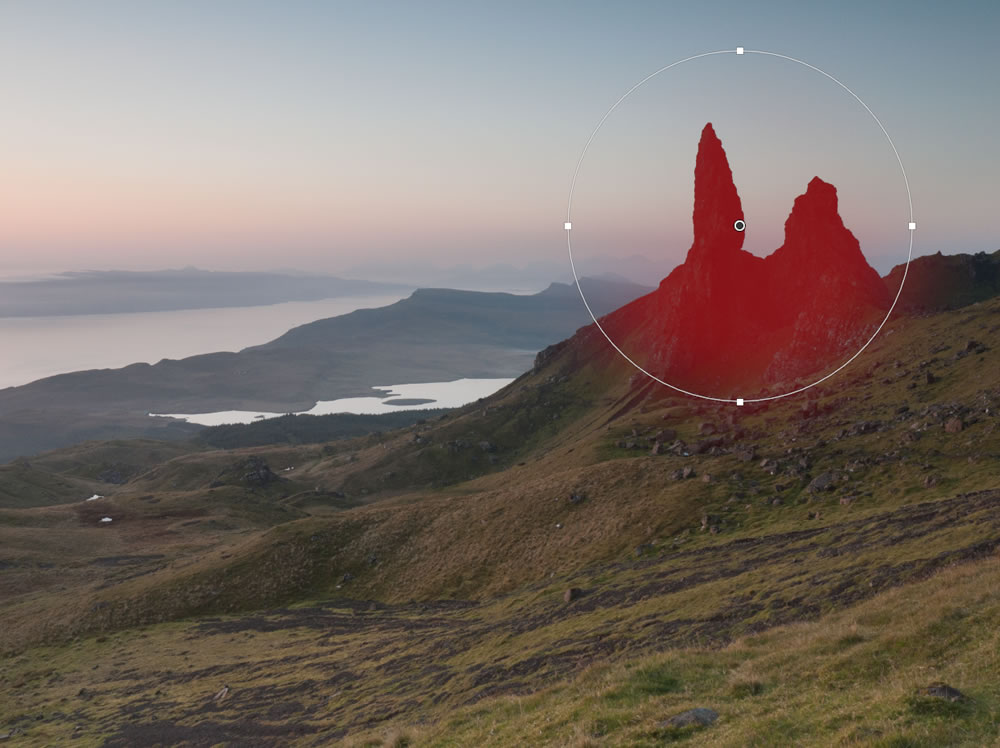
Now that I have access to the new tools, I can use, for instance, the radial filter to make a selection around the Needles and simply increase the exposure to bring out detail in the shadow area.
Of course, this means I would also be increasing the exposure of the surrounding sky as you can see in the image above causing an undesirable halo effect. The image below demonstrates with a red mask where I made the selection and increased the exposure (If you're wondering why I didn't simply increase the shadows only this would result in a decrease of contrast making the rock look flat and HDR-like).
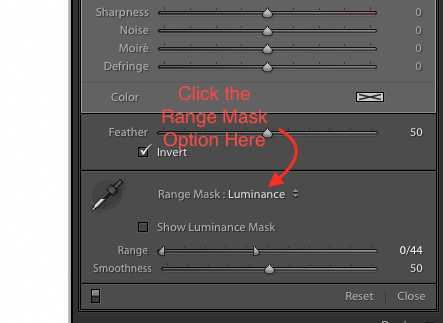
I can now use the Range Mask feature to blend in the exposure only for the darker areas of the selection using the 'Luminance' option. This is a brilliant new feature that wasn't available back when I first processed this image.
I can now demonstrate with the use of a red mask again what the effect of creating a Luminance Range Mask achieves.
This results in an adequately exposed area of rock that looks natural.
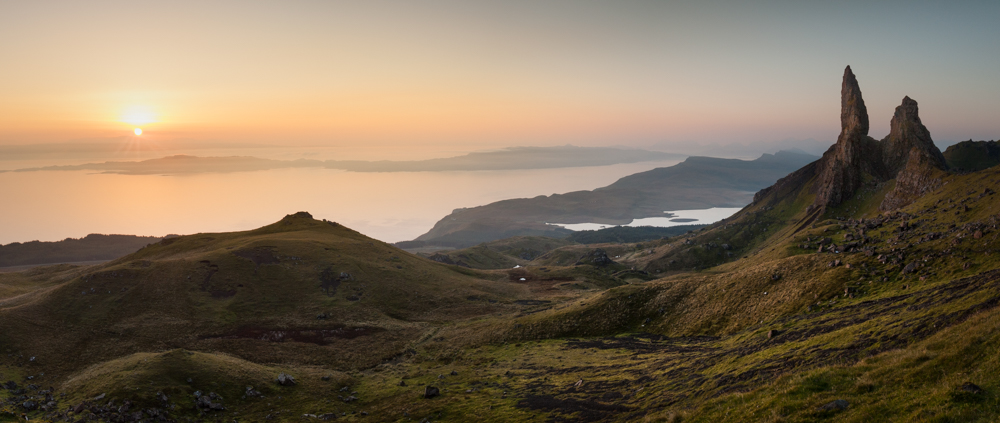
Now all I need to do is select this and the other 3 images I took at the same time, right-click on one of them and choose 'Photo Merge' > 'Panorama' and Lightroom will create a 32-bit DNG panoramic image without having to convert it to a TIFF or PSD file - perfect! :-)
After a bit more fine-tuning I'm left with a much-improved image which has been retained as a Raw and ready for printing or whatever else I want to do with it.
So, if you've been using Lightroom for a while, why not try giving one of your older images a new makeover to see if you can improve on your previous attempt? Good luck!