Fun with Flowers Pt. 2
Colour
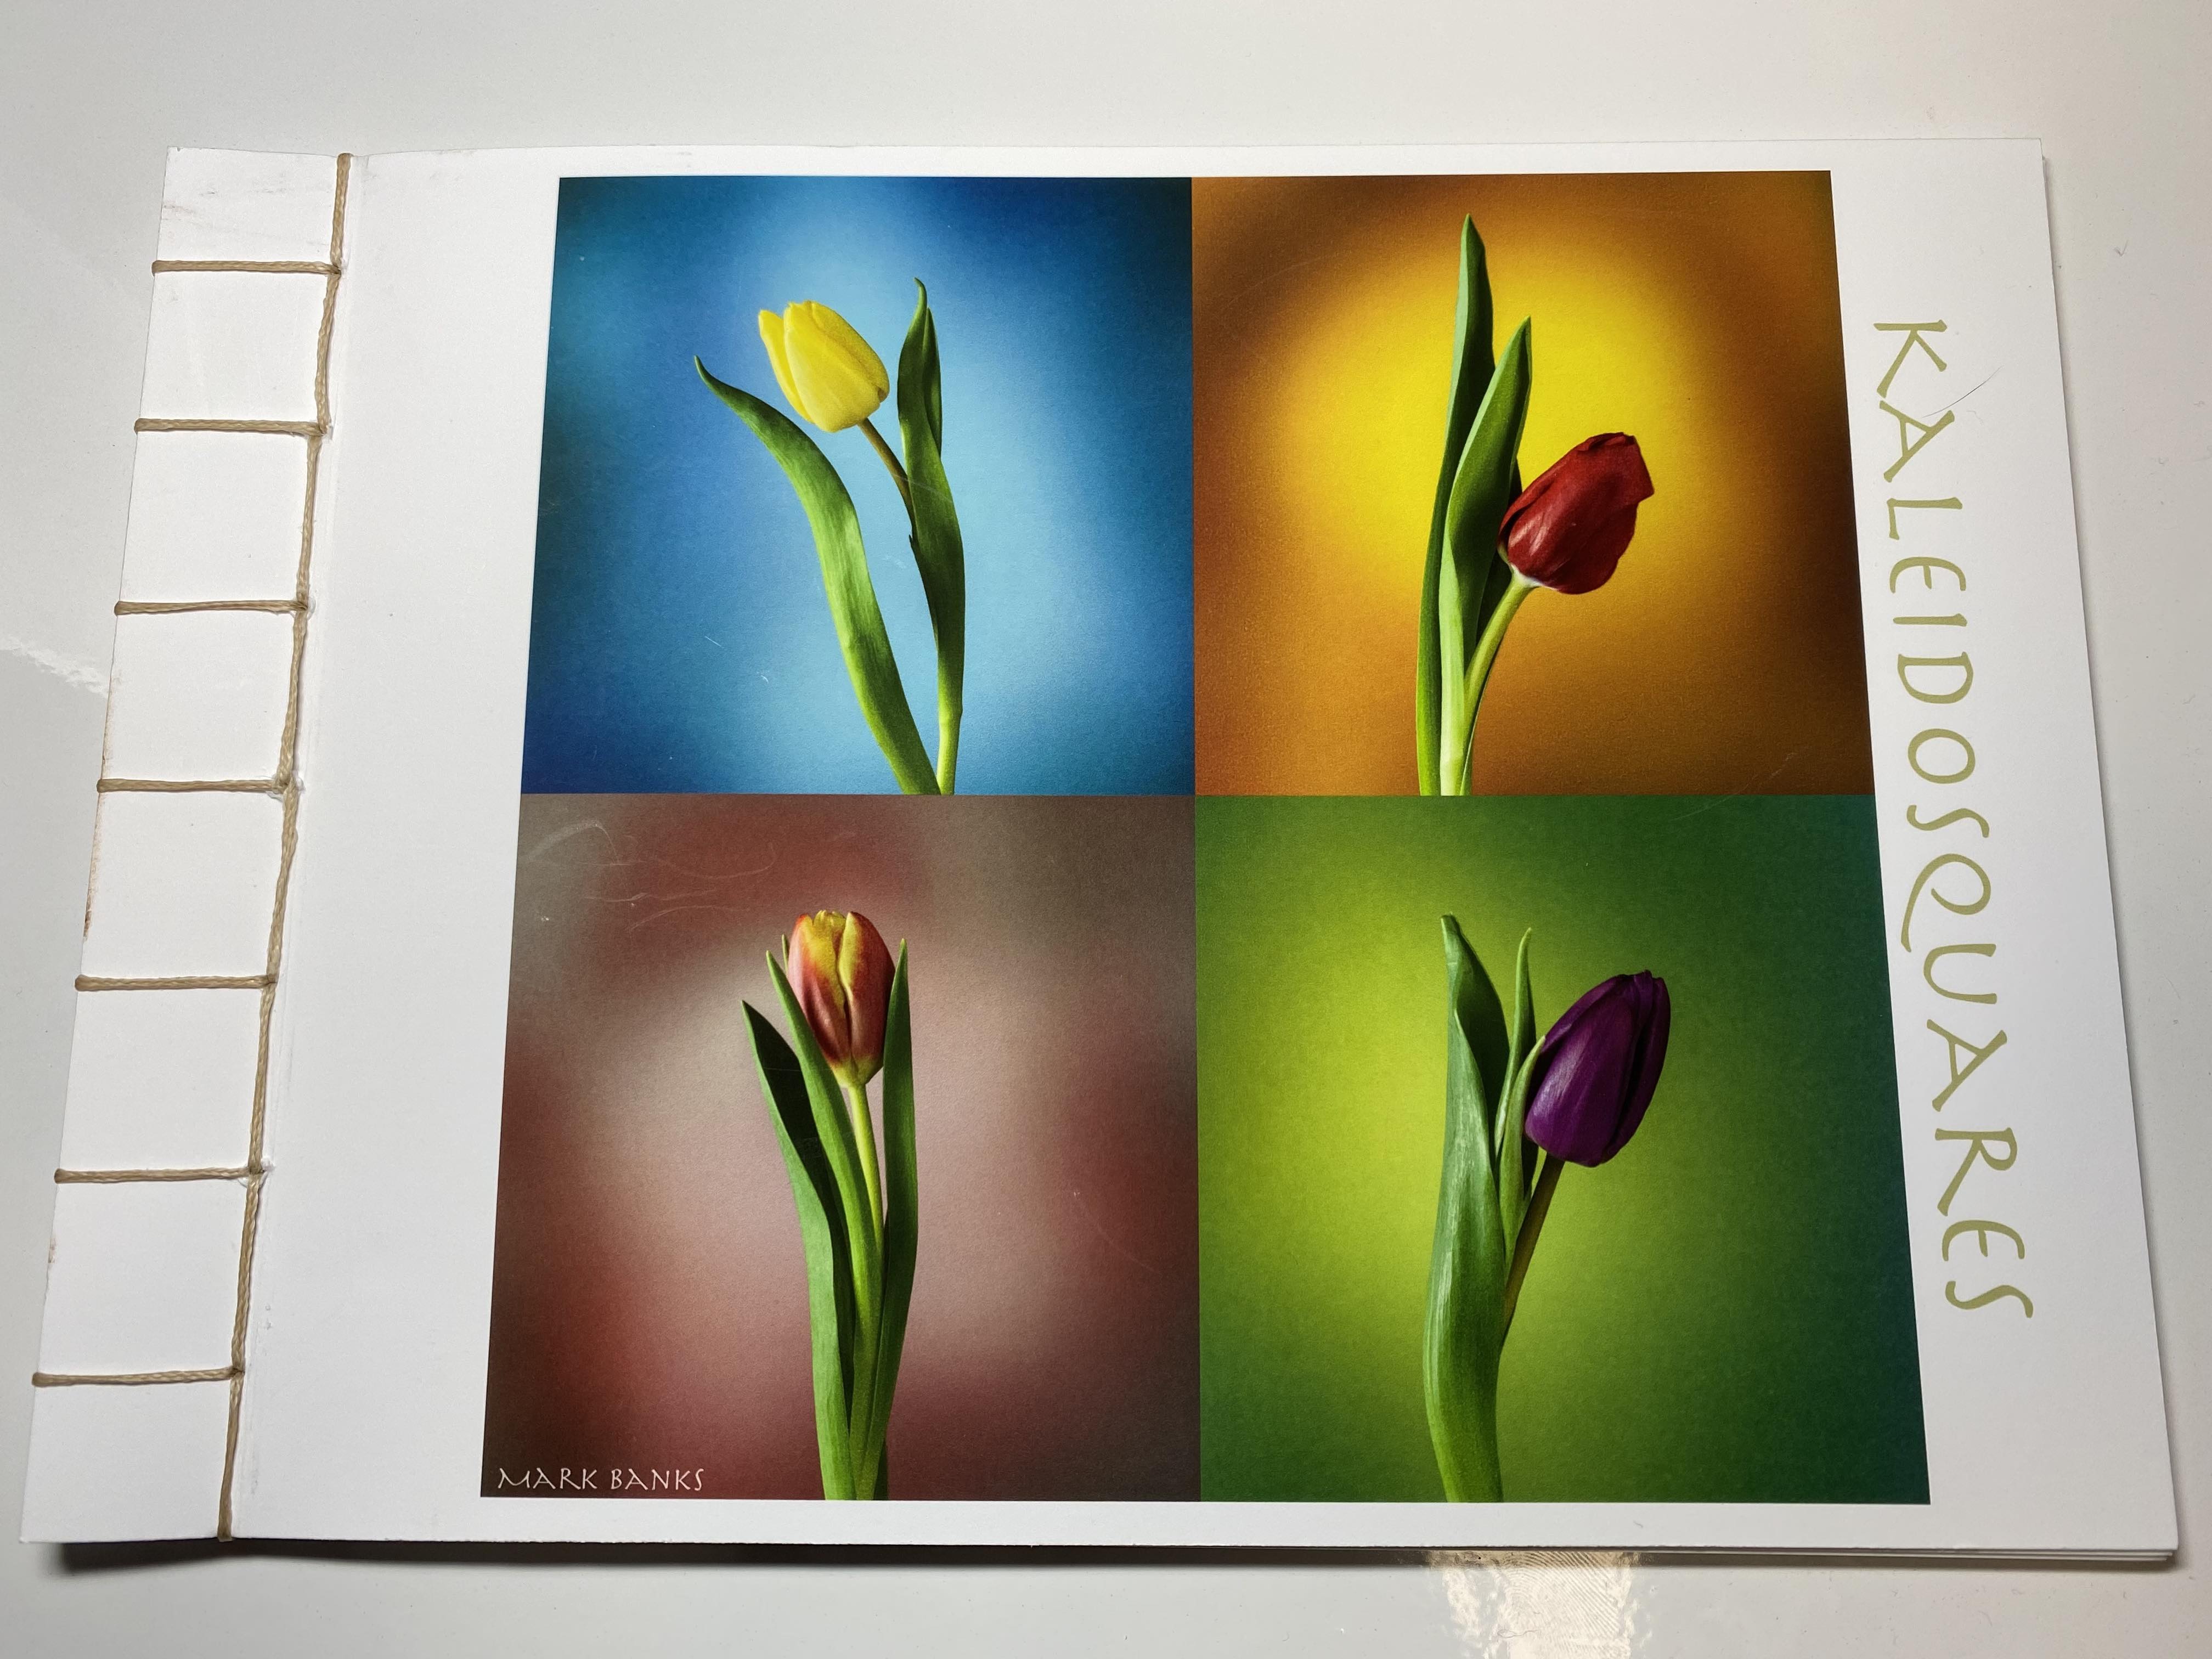
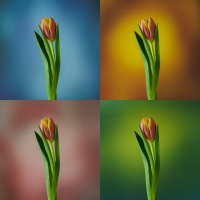
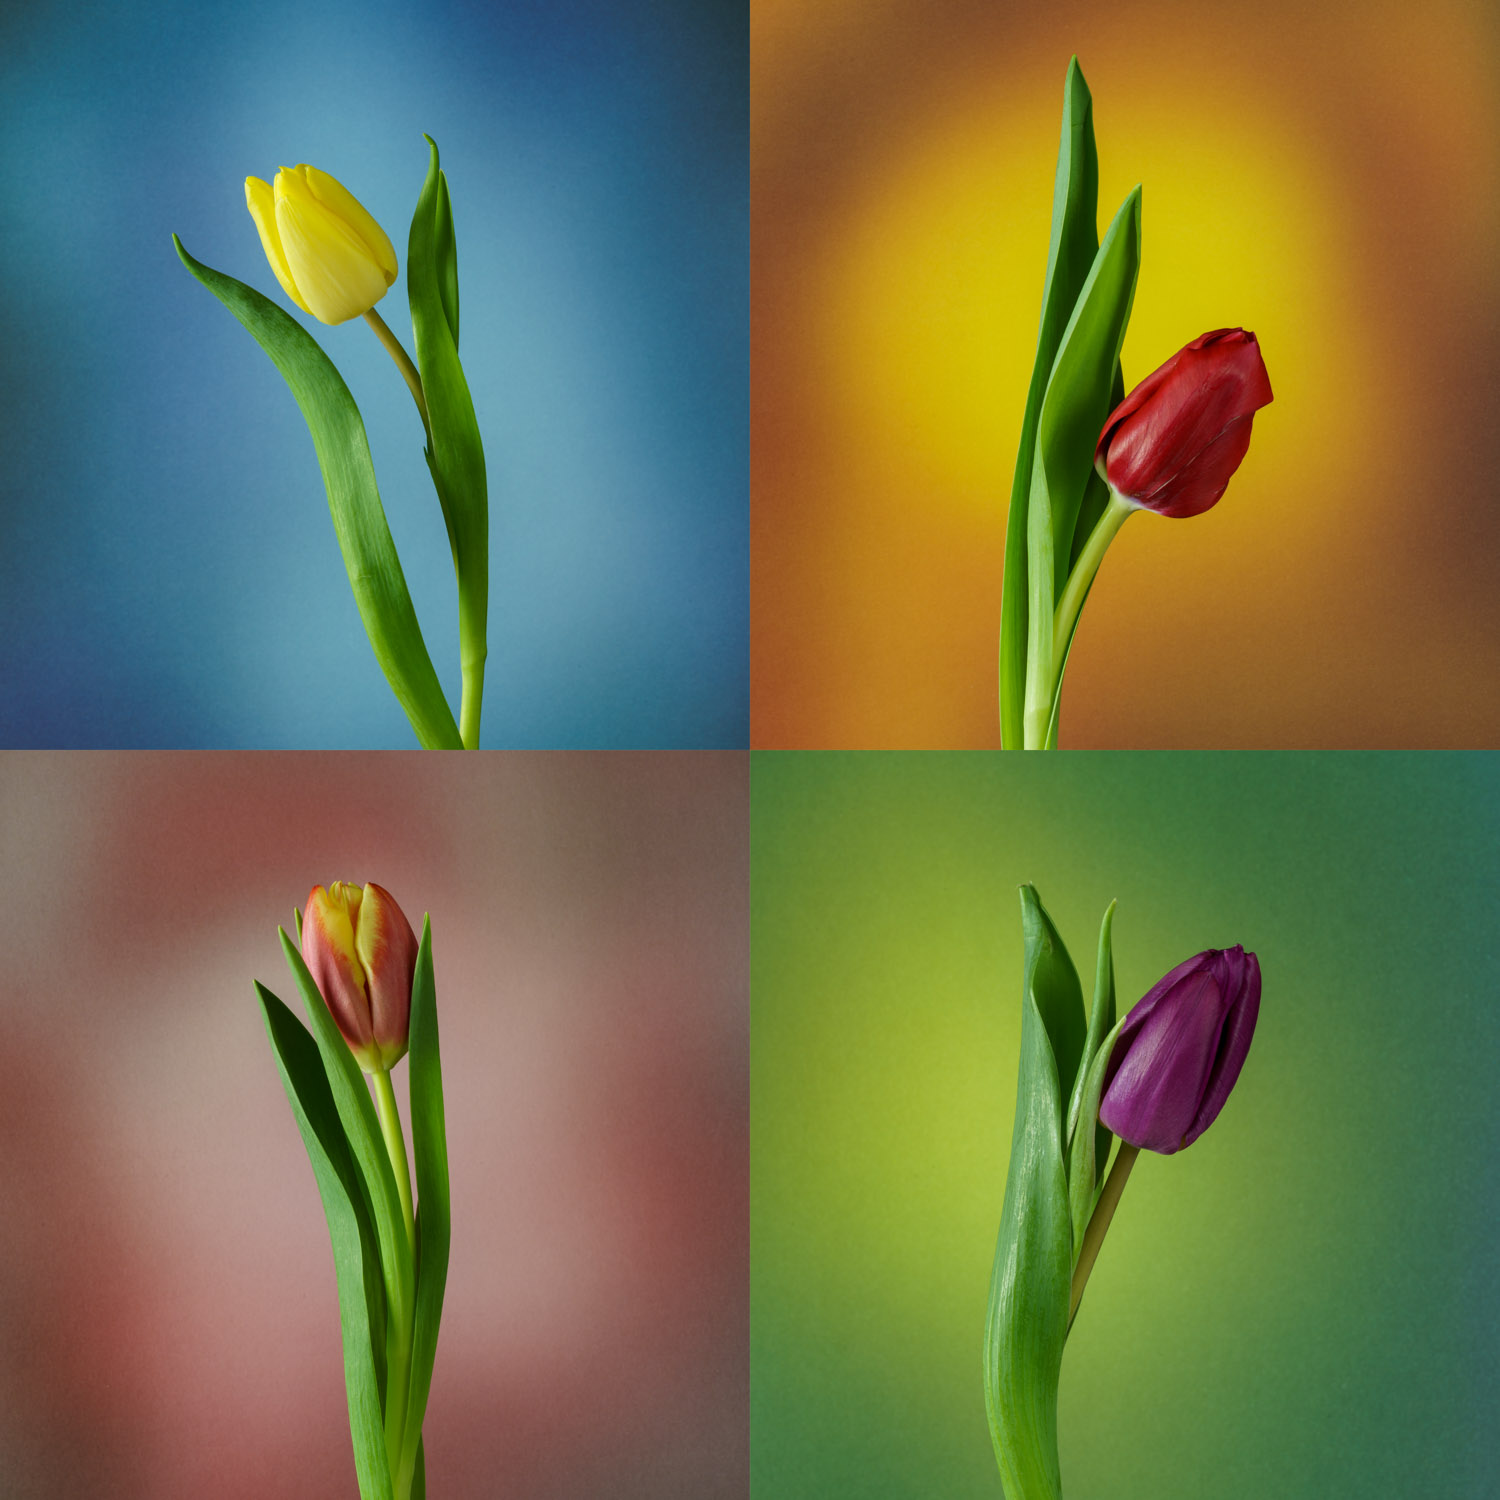
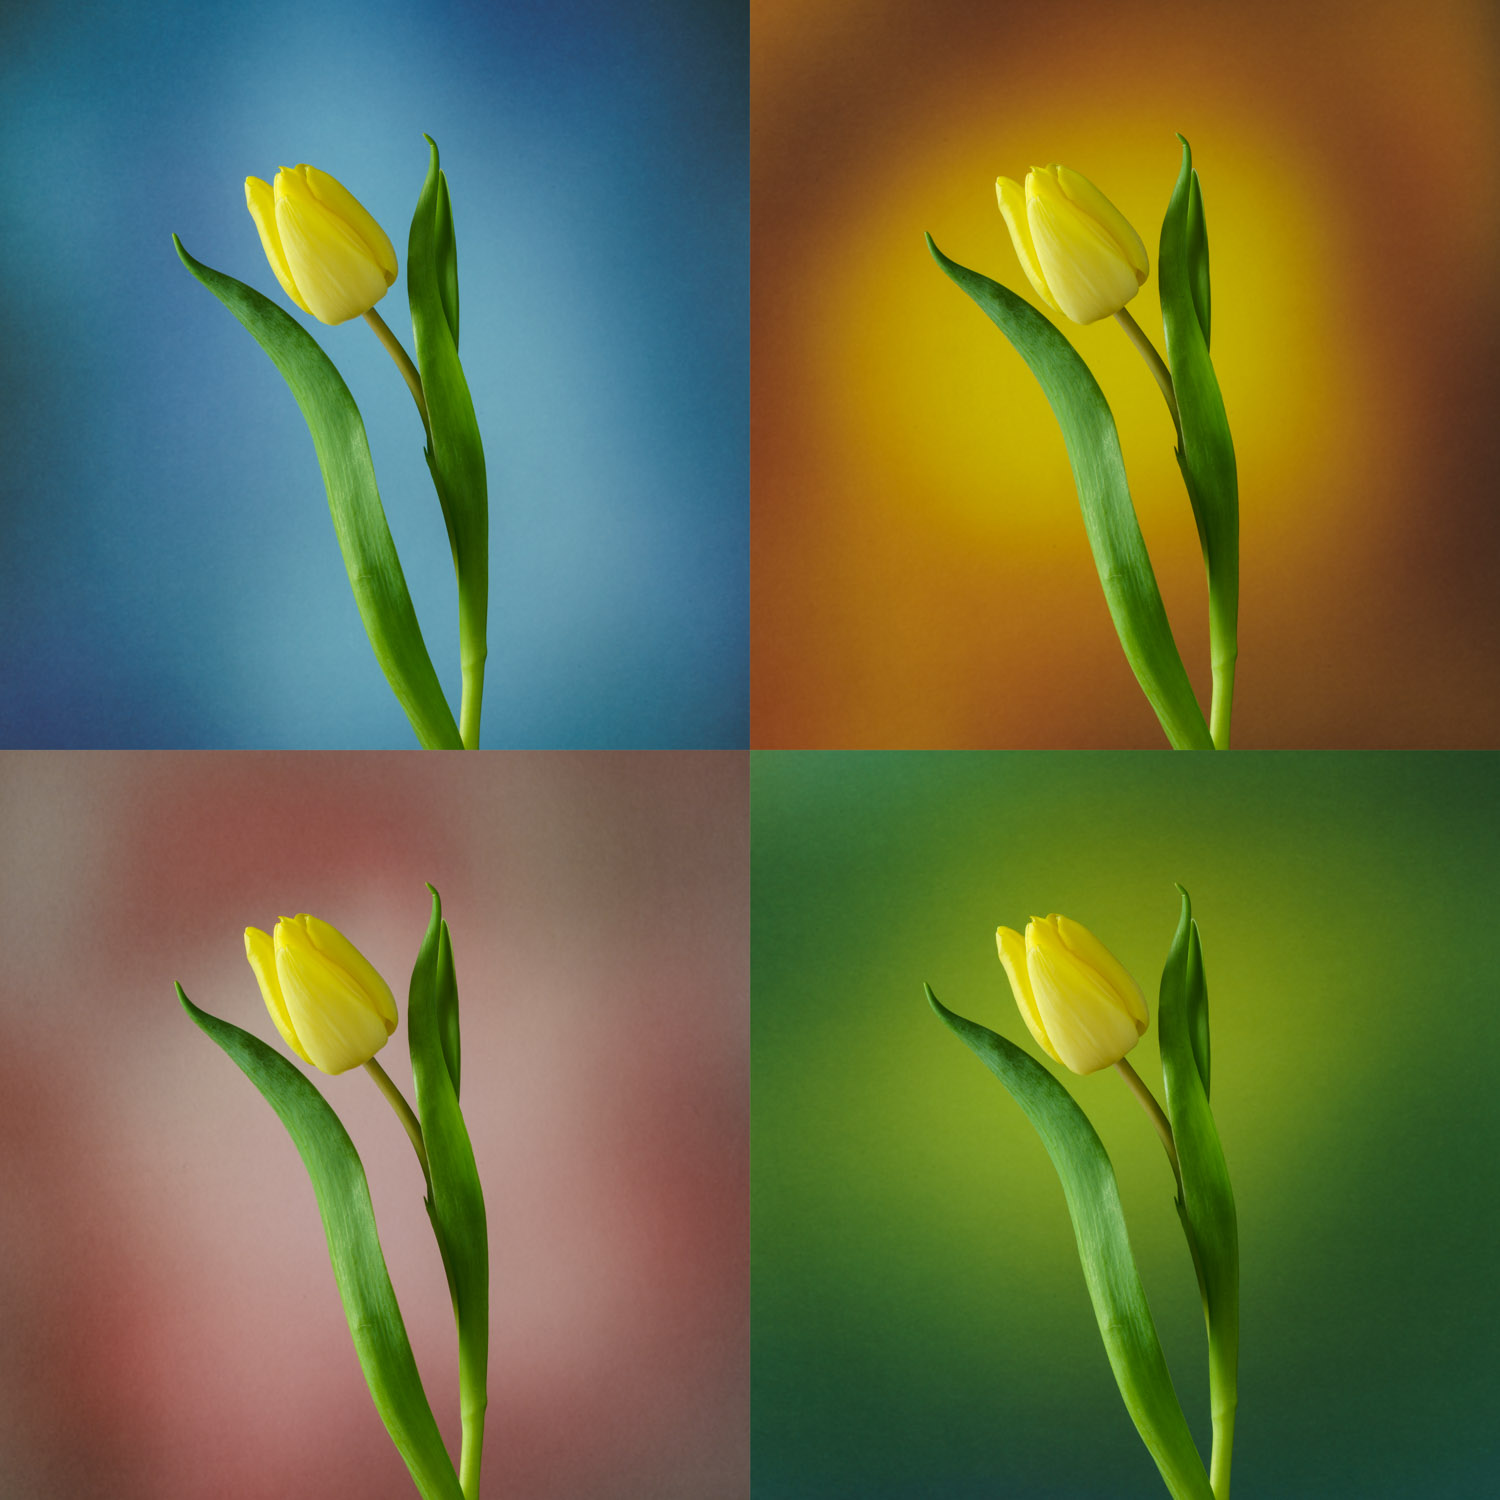
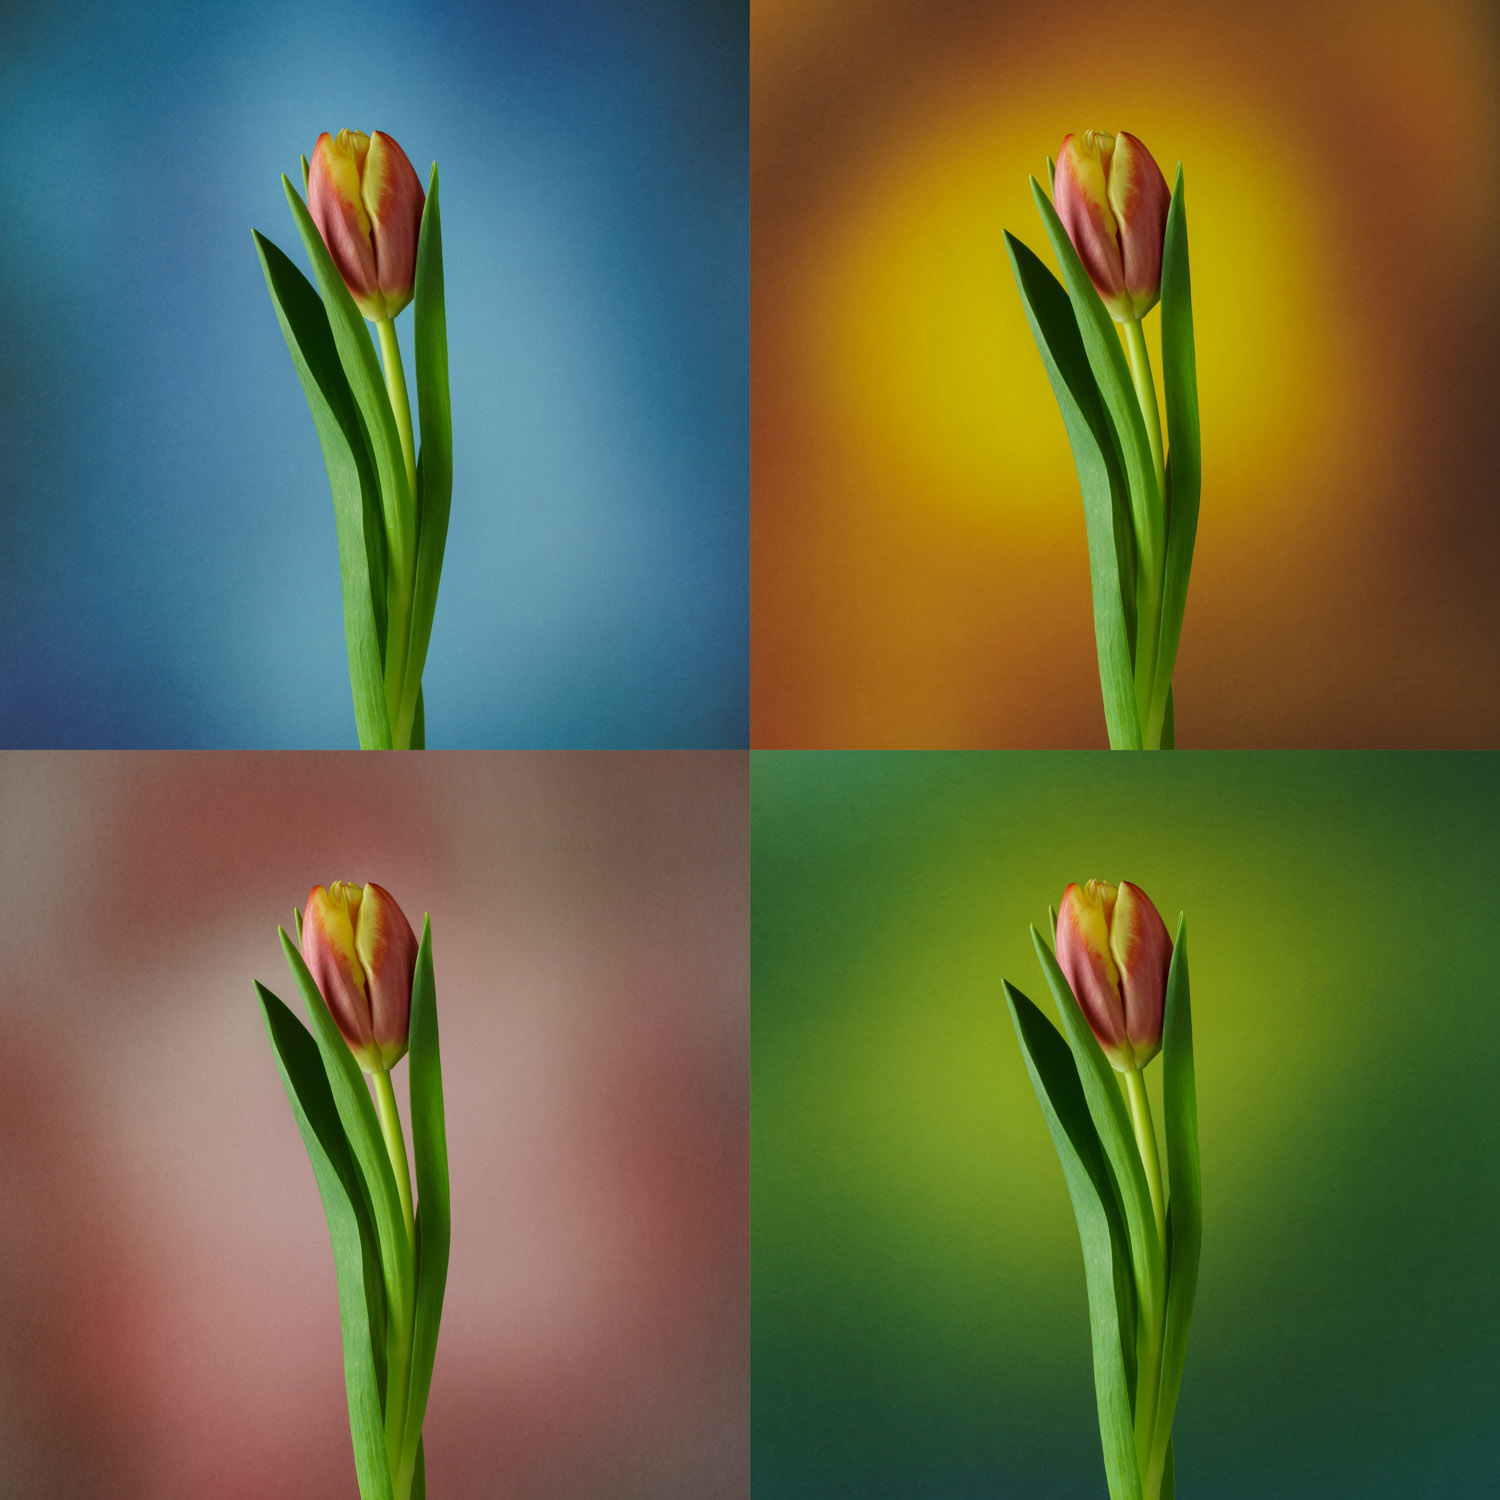
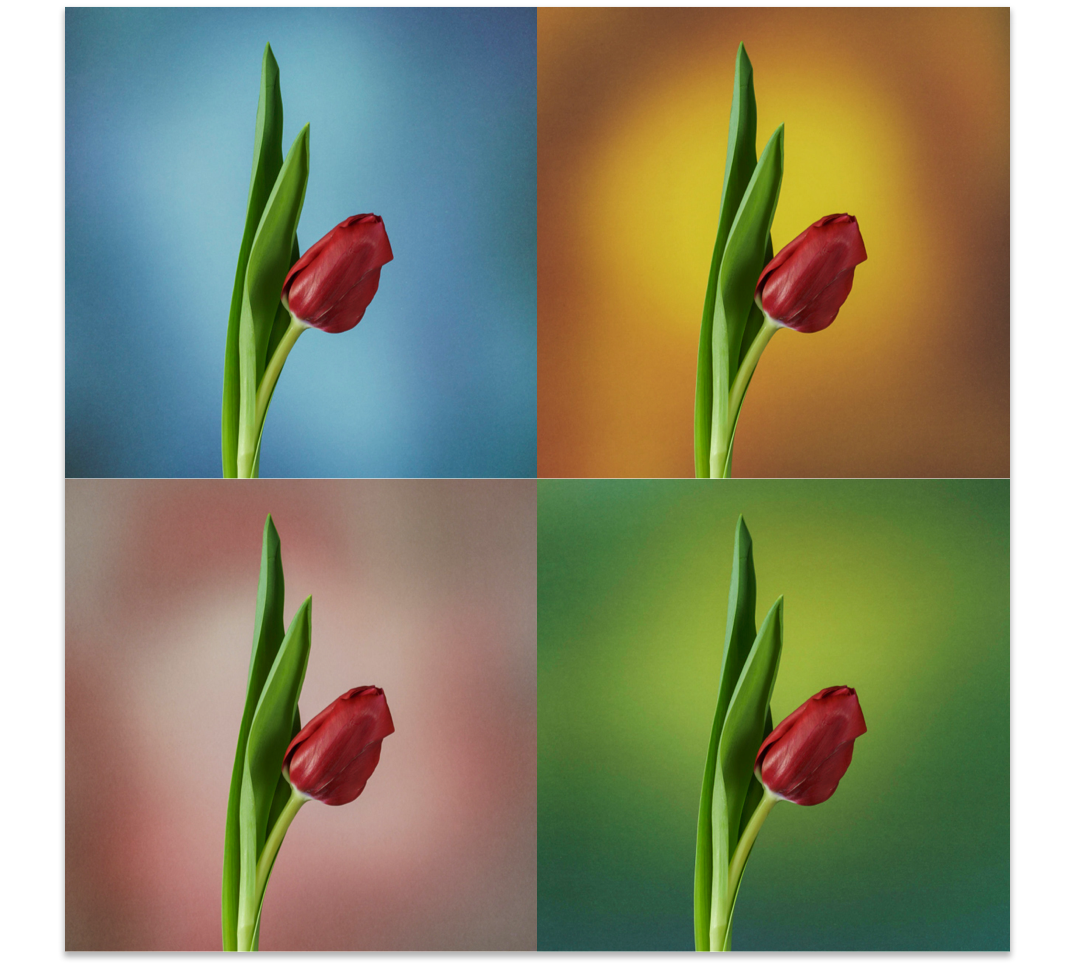
For this, more colourful project, I've created a set of tulip images using 12" square coloured-gradient card I had lying around. Although I used two softboxes to light the subject, you can achieve a similar effect using a desktop lamp (with daylight bulb) and light from a nearby window.
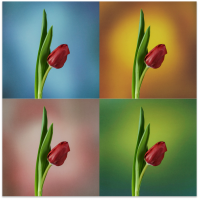
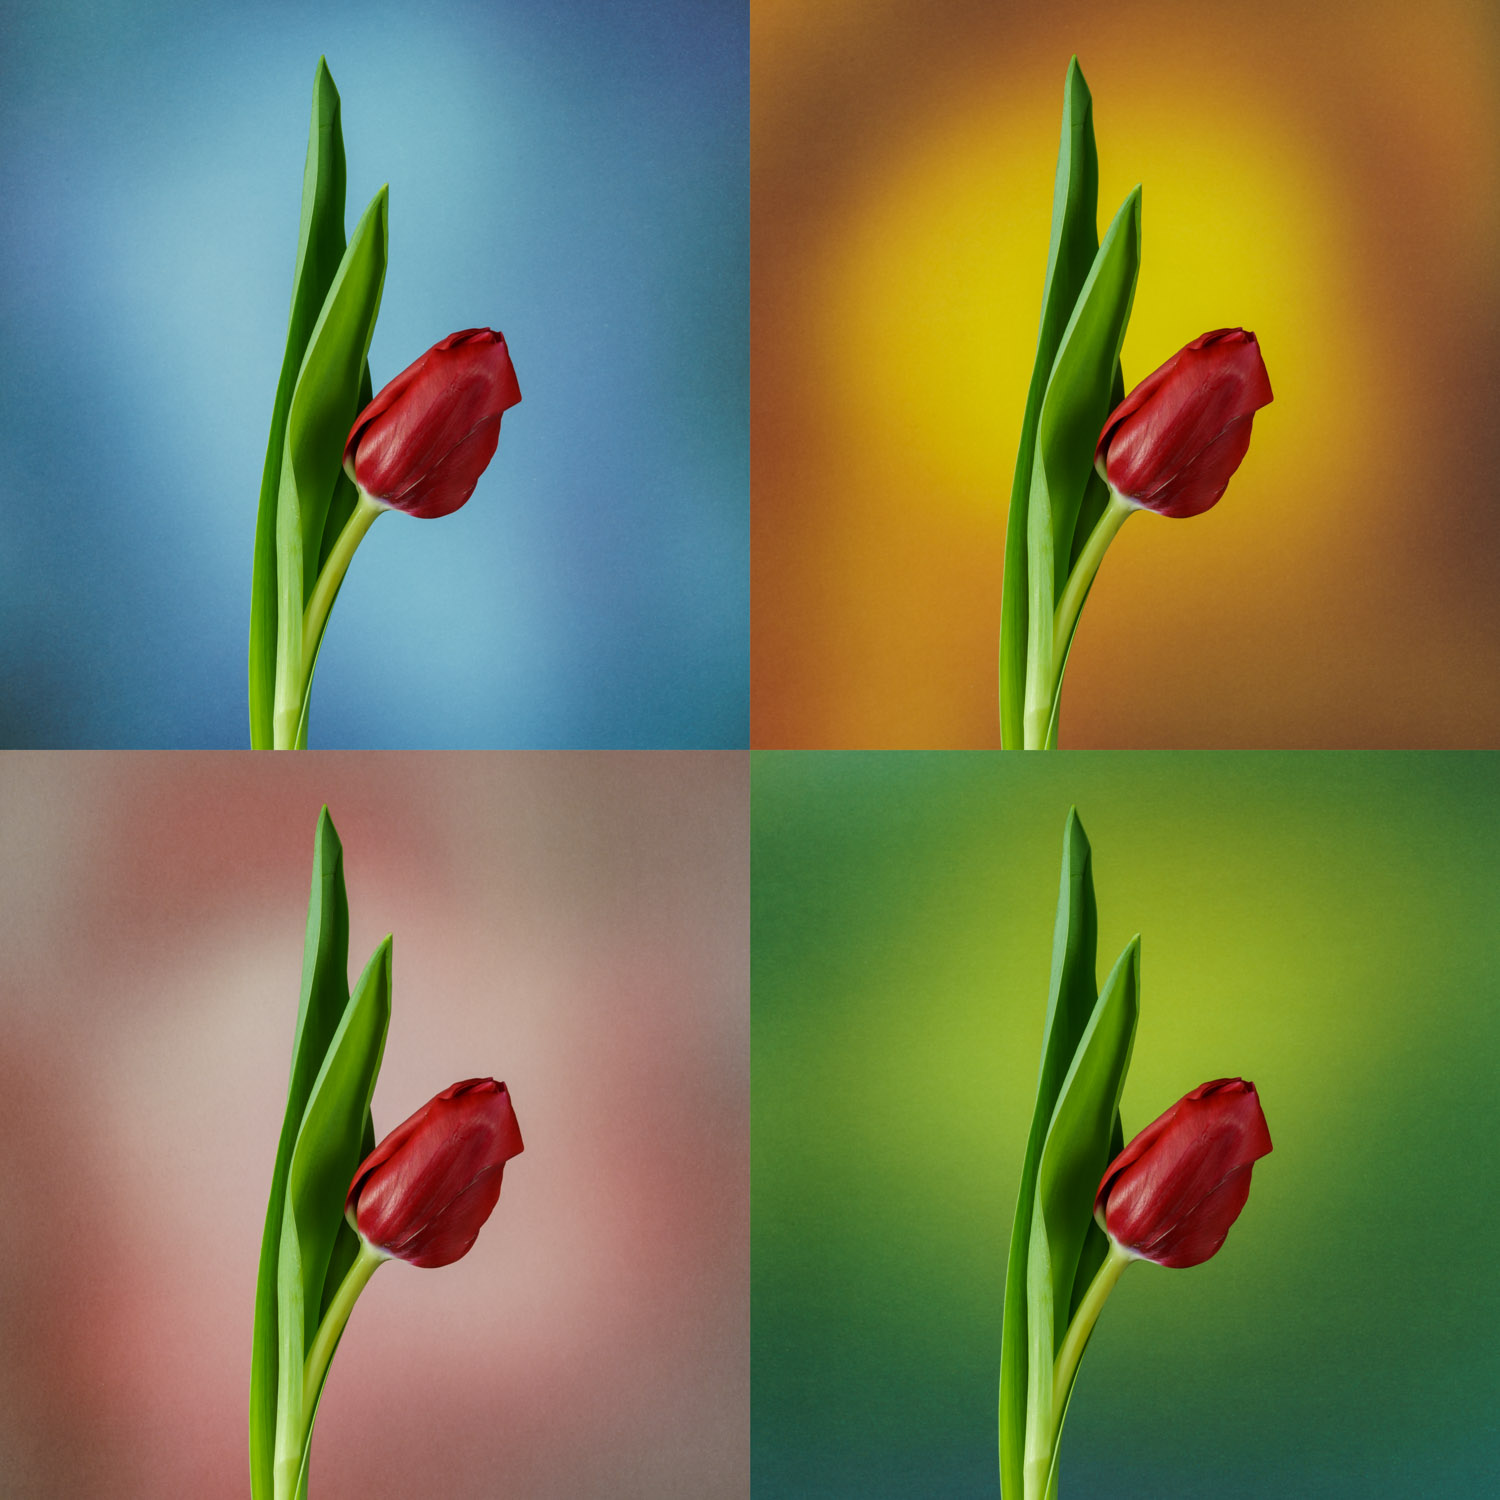
Influenced by Andy Warhol's famous Marilyn Monroe art, I took four identical images of the same flower using the same 100mm lens I used for last week's images, changing the background each time.

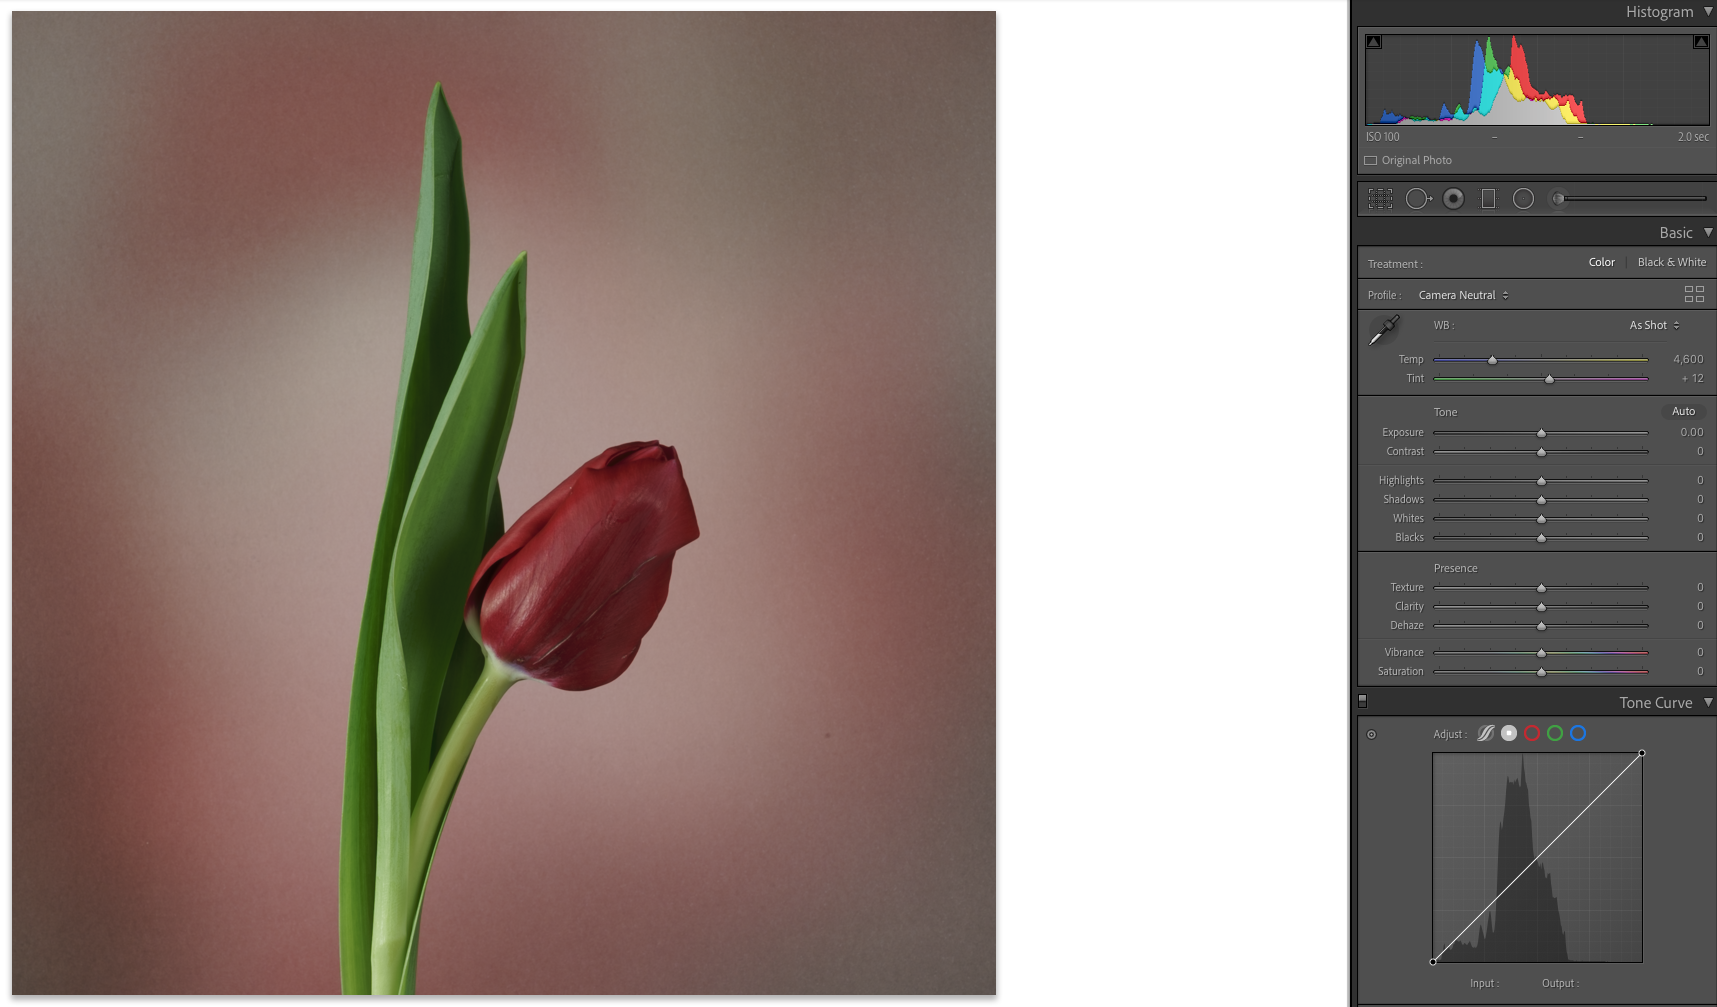
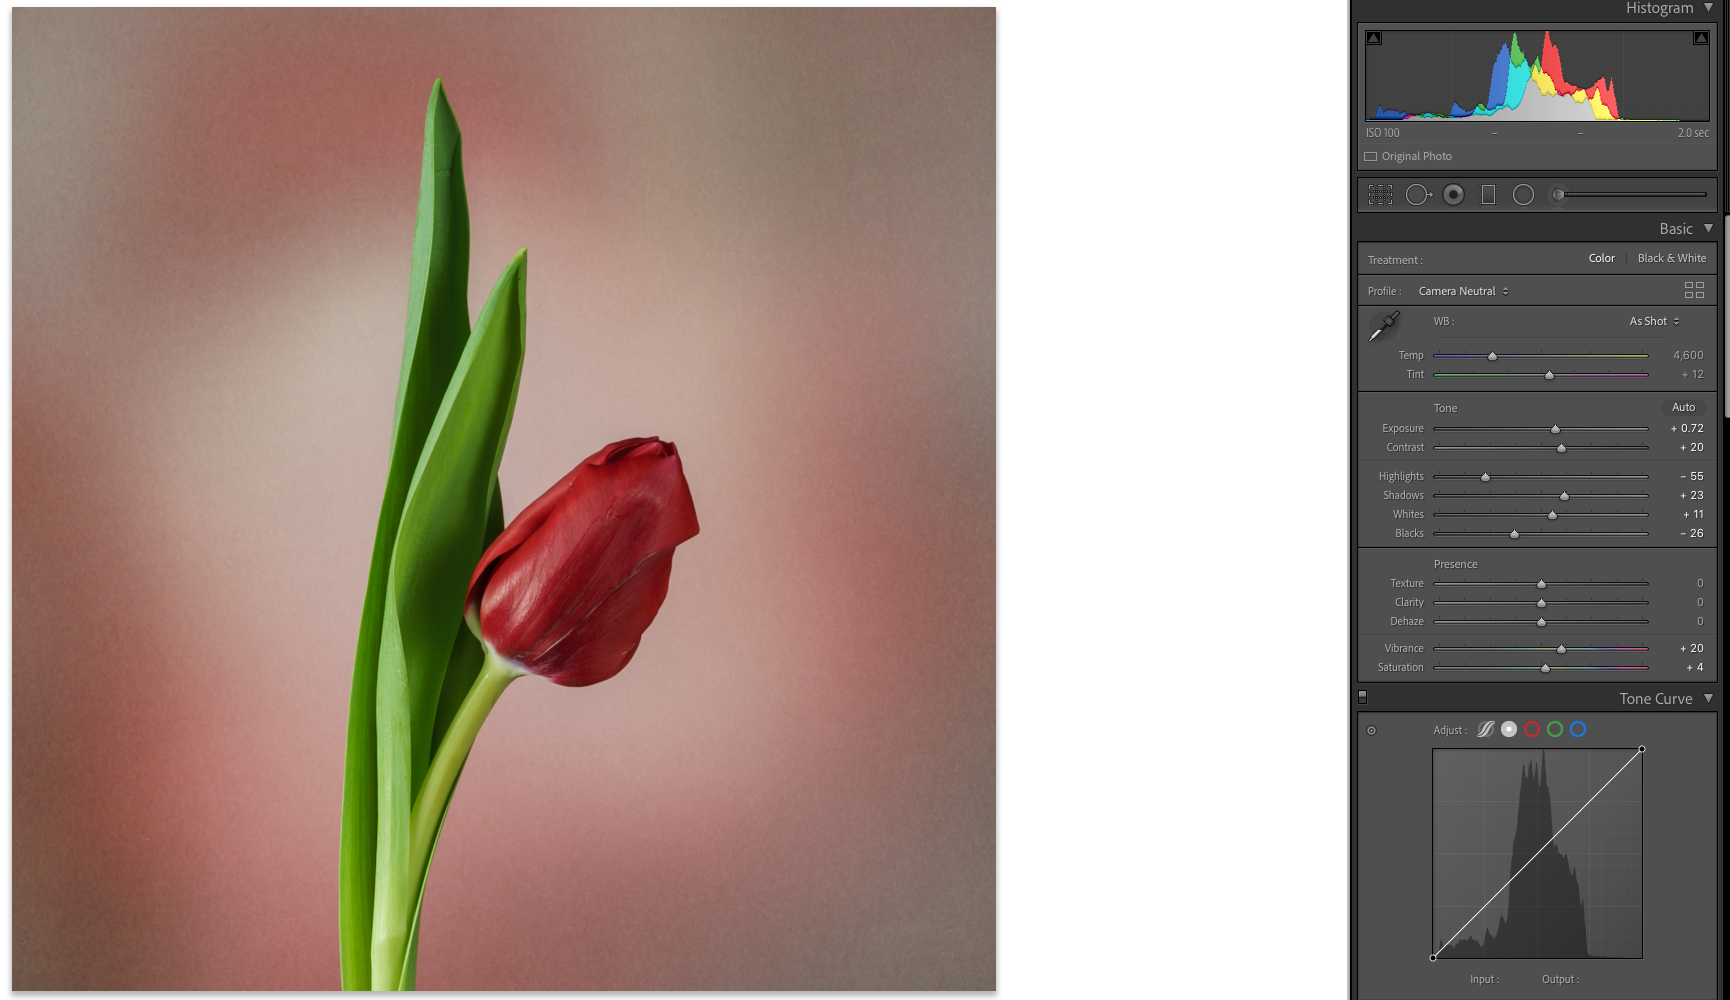
Once imported into Lightroom Classic, I used the tone curve to enhance one of the images' contrast before copying and pasting the settings to the other three images like so...
- Right-click on the processed image and choose 'Develop Settings' > 'Copy Settings' (Copy all options).
- Select the next image, right-click and choose 'Develop Settings' > 'Paste Settings'. Repeat for the final two images.
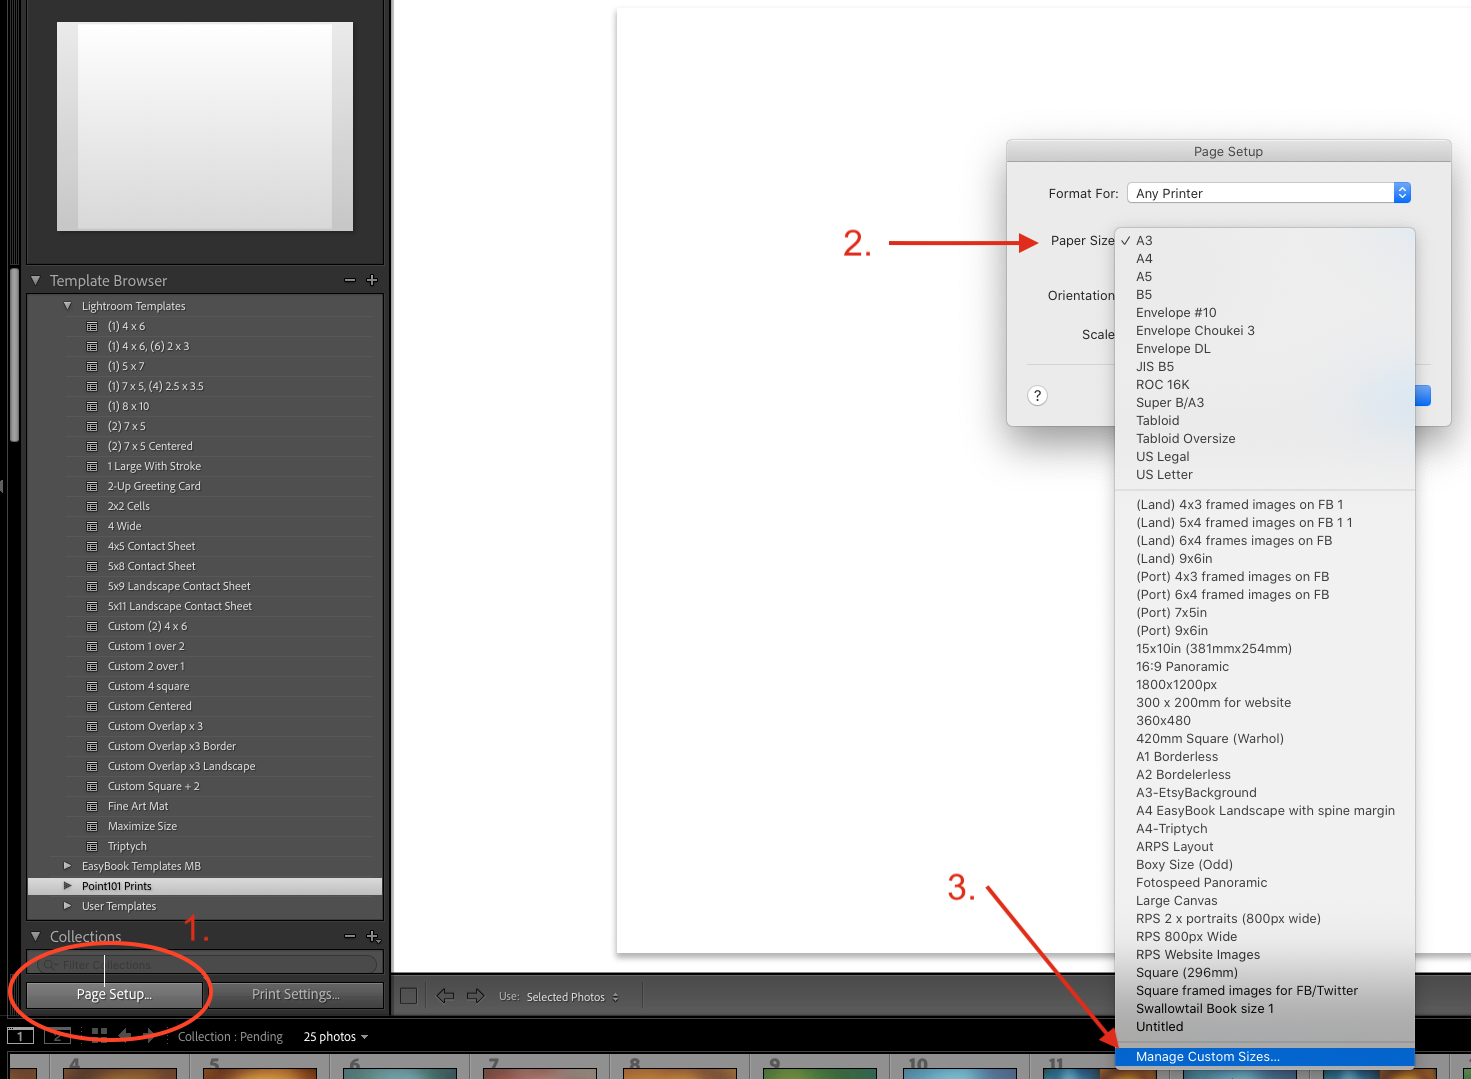
To create a 4-square 'Warhol' look, we will use Lightroom's Print Module (Click the related thumbnail at the bottom of the page for an enlarged view . As I am a Mac user, PC users may find a slight difference in layout).
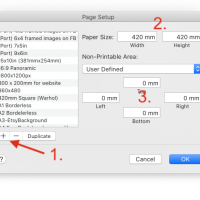
- Select the Print module and click the Page Setup button, bottom left [Screenshot 1].
- In the pop-up dialogue box that appears, click on 'Paper Size' and choose 'Manage Custom Sizes' down at the bottom of the list [Screenshot 1].
- Click the '+' option and type in the size of the image you would like to create (I chose a relatively large 420mm square just in case I want to make a sizeable poster-sized image in the future) [Screenshot 2].
- Set all margins (non-printable area) to zero [Screenshot 2].
- Click OK [Screenshot 2].
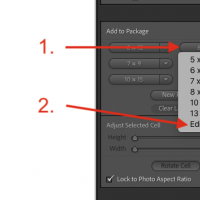
You have now created the square canvas within which we are going to insert our four images. We, therefore, need to create 4 square cells with which we can place our 4 individual images.
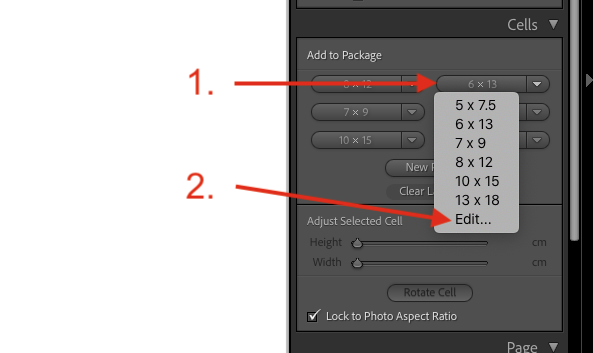
- In the right column, find the 'Cells' section and click the down arrow next to one of the buttons [Screenshot 3].
- Choose 'Edit'.
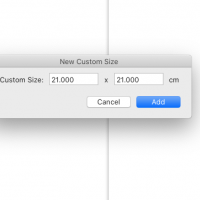
- Type in 21 cm to both boxes and click 'Add' [Screenshot 4].
- A square cell will appear on the white canvas. Click and drag this to the left corner. Repeat steps 1 to 4 to create another three cells, placing them in a 4-square 'Warhol' shape.
- From the Filmstrip at the bottom, click and drag your desired image into one of the four cells of your choice - repeating for the other 3 until you have your four images places in a 4-square [screenshot 5].
We now need to convert these 4 images into a single 'Warhol' image.
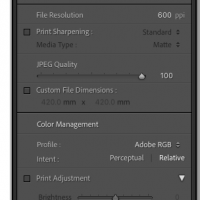
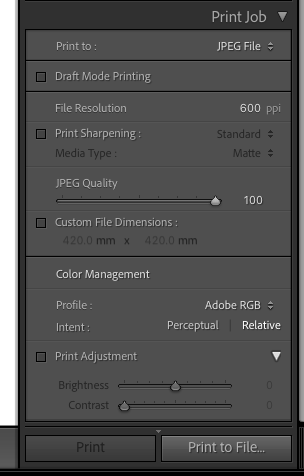
- In the 'Print Job' section in the right panel, choose 'Jpeg File' in the 'Print To' section [screenshot 6].
- For File Resolution choose around 300-400 ppi for this size of image (unlike what it says in the screenshot 6) [screenshot 6].
- Keep Jpeg Quality 'High' (you don't know yet, what quality you will ever need) [screenshot 6].
- Choose 'Adobe RGB' (In case you need a quality 16-bit print) [screenshot 6].
- Leave all other settings as they are [screenshot 6].
- Click the 'Print to File' button,
- In the pop-up box that appears, give the file a name and save it back into the original folder from where your original images originated (to keep them all together) and click 'Save'.
Your image has now been saved. However, Lightroom will not be able to see it until Imported back into the Library. Therefore...
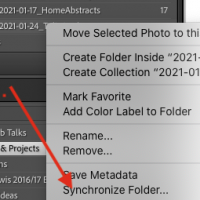
- Return to the Library Module and, in the left column, navigate to the folder where you have placed the 'Warhol' image.
- Right-click on the filename of the folder and choose 'Synchronise Folder' from the pop-up box that appears [screenshot 7].
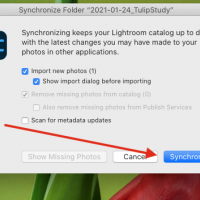
- Lightroom should detect the image, so simply click the 'Synchronise' button [screenshot 8].
- Your image will be imported back into Lightroom and added to the folder you selected.
You should now have a nice 'Warhol' effect image ready for whatever you want it for. Of course, it would make an ideal large print or canvas. Or why not include it with all the separate images to create a simple artisan Japanese-style book for your coffee table? Have fun!!