Exporting/Importing Lightroom Catalogs
I believe an important aspect of landscape photography is post-processing. This is why I like to find time to demonstrate processing techniques when running my residential workshops (usually at night or at times of inclement weather).
After processing a participant's image, I export it as a Catalog rather than just the final image before sending it to them. This has the added advantage that, once they have imported it to their copy of Lightroom, they can not only see the final edited image but also use the History panel as an aid memoir to the steps I took to create the final result.
As many of my clients process their images on their laptops whilst away on a workshop (or holiday), I thought it would be a good idea to create an article on how to transfer your images to your desktop computer on your return home (if that's how you work).
Exporting your image/s.
- In Lightroom Classic's Library module select the image/s you wish to export.
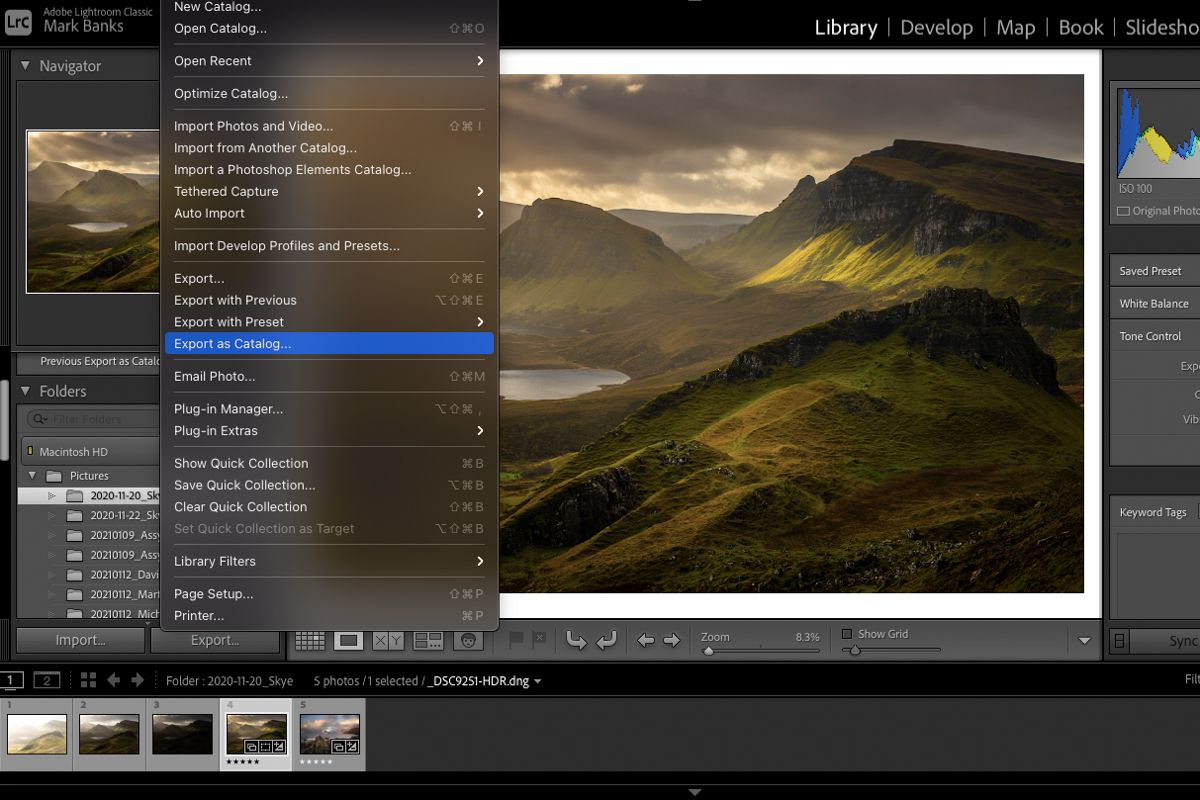
- In the top toolbar select 'File > Export as Catalog'.
- In the pop-up box that appears give your export a name in the 'Save As' section at the top before clicking on the 'Export Catalog' button at the bottom (I have the 'Export Negative Files' and 'Include available Previews' tickboxes checked but experiment with these as you wish). As it's only temporary, I tend to save the catalog to the desktop of my laptop.
Importing your image/s.
- After returning home, transfer the Catalog folder from the desktop of your laptop (or wherever you stored it) to where you would like to store the image on your desktop (The Pictures folder for instance).
- In Lightroom Classic's Library module (of your desktop computer), Choose 'File > Import from another Catalog...'
- Navigate to where you placed the folder (The Pictures folder for instance) and, within that folder, select the file that ends with .lrcat
- Now click the 'Choose' button to instigate the import process.
Your processed image/s will now be in your Lightroom Library (in whichever destination folder you placed it) and you will see that all edits and history settings have been saved. From this point, you can admire your processed image or carry on with further edits as you so wish.
I hope you find this information useful. If you would like to be notified of any future tips and tricks on all aspects of photography and processing consider signing up to my monthly newsletter (link at the bottom of the home page).